@[toc]
目的
主要了解如何使得 OLED 显示
硬件
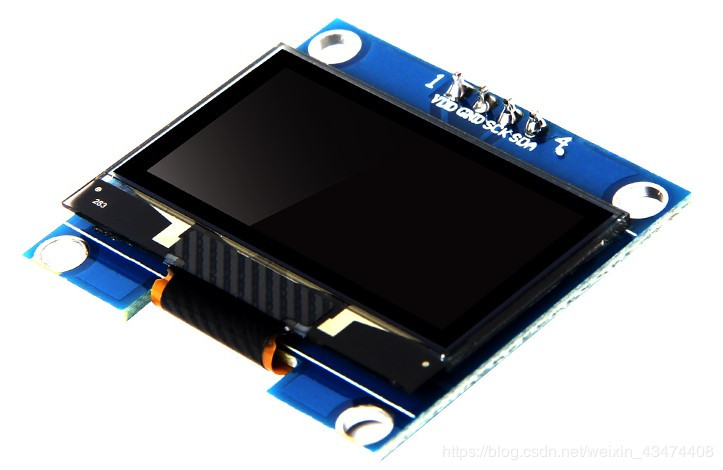
- 1.3 寸 oled 显示屏模块 12864 液晶屏 oled 显示屏模块 4 针 iic 接口 sh1106
- BPI-UNO32
主要函数
SH1106Wire(uint8_t _address, uint8_t _sda, uint8_t _scl, OLEDDISPLAY_GEOMETRY g = GEOMETRY_128_64) 用于生成一个 SH1106Wire 对象
| 参数 | 功能 |
|---|---|
| _address | i2c 的地址 |
| _sda | SDA 对应的 PIN |
| _scl | SCL 对应的 PIN |
| g | OLED 分辨率(默认为 128*64 ) |
void OLEDDisplay::setTextAlignment(OLEDDISPLAY_TEXT_ALIGNMENT textAlignment) 文本呈现方式。可用常量:TEXT_ALIGN_LEFT, TEXT_ALIGN_CENTER, TEXT_ALIGN_RIGHT, TEXT_ALIGN_CENTER_BOTH
void OLEDDisplay::setFont(const uint8_t *fontData) 设置当前字体。可用的默认字体:ArialMT_Plain_10, ArialMT_Plain_16, ArialMT_Plain_24
void OLEDDisplay::drawString(int16_t xMove, int16_t yMove, String strUser) 在给定的位置绘制字符串
void OLEDDisplay::drawXbm(int16_t xMove, int16_t yMove, int16_t width, int16_t height, const uint8_t *xbm 绘制 XBM 图片
ui.update()使当天界面变换到下一界面
示例代码
main.cpp
//Include firmware libraries
#include "Arduino.h"
#include "SH1106Wire.h"

//Include Ui libraries
#include "OLEDDisplayUi.h"

//Include custom libraries
#include "myImages.h"

// Initialize the OLED display using Wire library
SH1106Wire display(0x3c, 21, 22);

OLEDDisplayUi ui(&display);

void drawFrame1(OLEDDisplay *display, OLEDDisplayUiState *state, int16_t x, int16_t y)
{
    // draw an xbm image.
    // Please note that everything that should be transitioned
    // needs to be drawn relative to x and y

    display->drawXbm(x+20, y, Logo_width, Logo_height, jin_logo);
    display->drawString(75 + x, 30 + y, "Chentoday");
}

void drawFrame2(OLEDDisplay *display, OLEDDisplayUiState *state, int16_t x, int16_t y)
{
    // Demonstrates the 3 included default sizes. The fonts come from SSD1306Fonts.h file
    // Besides the default fonts there will be a program to convert TrueType fonts into this format
    display->setTextAlignment(TEXT_ALIGN_LEFT);
    display->setFont(ArialMT_Plain_10);
    display->drawString(0 + x, 10 + y, "Must");

    display->setFont(ArialMT_Plain_16);
    display->drawString(0 + x, 20 + y, "Study");

    display->setFont(ArialMT_Plain_24);
    display->drawString(0 + x, 34 + y, "Hard");
}

void drawFrame3(OLEDDisplay *display, OLEDDisplayUiState *state, int16_t x, int16_t y)
{
    // Text alignment demo
    display->setFont(ArialMT_Plain_10);

    // The coordinates define the left starting point of the text
    display->setTextAlignment(TEXT_ALIGN_LEFT);
    display->drawString(0 + x, 11 + y, "Left aligned (0,10)");

    // The coordinates define the center of the text
    display->setTextAlignment(TEXT_ALIGN_CENTER);
    display->drawString(64 + x, 22 + y, "Center aligned (64,22)");

    // The coordinates define the right end of the text
    display->setTextAlignment(TEXT_ALIGN_RIGHT);
    display->drawString(128 + x, 33 + y, "Right aligned (128,33)");
}

void drawFrame4(OLEDDisplay *display, OLEDDisplayUiState *state, int16_t x, int16_t y)
{
    // Demo for drawStringMaxWidth:
    // with the third parameter you can define the width after which words will be wrapped.
    // Currently only spaces and "-" are allowed for wrapping
    display->setTextAlignment(TEXT_ALIGN_LEFT);
    display->setFont(ArialMT_Plain_10);
    display->drawStringMaxWidth(0 + x, 10 + y, 128, "Say to yourself: \n No matter how many obstacles I encourcer in life, I will do all that I can to complete the whole course.");
}


// This array keeps function pointers to all frames
// frames are the single views that slide in
FrameCallback frames[] = {drawFrame1, drawFrame2, drawFrame3, drawFrame4};
// how many frames are there?
int frameCount = 4;


void setup()
{
    Serial.begin(115200);
    Serial.println();
    Serial.println();

    // The ESP is capable of rendering 60fps in 80Mhz mode
    // but that won't give you much time for anything else
    // run it in 160Mhz mode or just set it to 30 fps
    ui.setTargetFPS(60);

    // Customize the active and inactive symbol
    ui.setActiveSymbol(activeSymbol);
    ui.setInactiveSymbol(inactiveSymbol);

     // You can change this to
  // TOP, LEFT, BOTTOM, RIGHT
  ui.setIndicatorPosition(BOTTOM);

   // Defines where the first frame is located in the bar.
  ui.setIndicatorDirection(LEFT_RIGHT);

  // You can change the transition that is used
  // SLIDE_LEFT, SLIDE_RIGHT, SLIDE_UP, SLIDE_DOWN
  ui.setFrameAnimation(SLIDE_LEFT);

   // Add frames
  ui.setFrames(frames, frameCount);


 // Initialising the UI will init the display too.
  ui.init();

  display.flipScreenVertically();
}

void loop() {
  int remainingTimeBudget = ui.update();

  if (remainingTimeBudget > 0) {
    // You can do some work here
    // Don't do stuff if you are below your
    // time budget.
    delay(remainingTimeBudget);
  }
}
myImage.h
#define Logo_width 60
#define Logo_height 60
#define WiFi_Logo_width 60
#define WiFi_Logo_height 36


const uint8_t jin_logo[] PROGMEM =
{
0x00,0x00,0x00,0x60,0x00,0x00,0x00,0x00,0x00,0x00,0x00,0xF8,0x01,0x00,0x00,0x00,
0x00,0x00,0x00,0xFE,0x03,0x00,0x00,0x00,0x00,0x00,0x00,0x0F,0x0F,0x00,0x00,0x00,
0x00,0x00,0xC0,0x03,0x1C,0x00,0x00,0x00,0x00,0x00,0xE0,0x00,0x38,0x00,0x00,0x00,
0x00,0x00,0x70,0x00,0xE0,0x00,0x00,0x00,0x00,0x00,0x38,0x00,0xC0,0x00,0x00,0x00,
0x00,0x7C,0x0C,0xFE,0x87,0xE1,0x03,0x00,0x80,0xFF,0xEF,0xFF,0xFF,0xFF,0x1F,0x00,
0xC0,0x83,0xFF,0x01,0xFC,0x1F,0x3C,0x00,0x70,0x00,0x1F,0x00,0x80,0x07,0xE0,0x00,
0x30,0x00,0x03,0x00,0x00,0x0E,0xC0,0x00,0x18,0x80,0x03,0x00,0x00,0x0C,0x80,0x01,
0x18,0x80,0x01,0x00,0x00,0x18,0x80,0x01,0x0C,0x80,0x01,0x00,0x00,0x18,0x38,0x03,
0xFC,0x83,0x01,0x00,0x00,0x18,0xF8,0x03,0xFC,0x83,0x01,0x00,0x00,0x18,0xF0,0x03,
0xC0,0x81,0x01,0x00,0x00,0x30,0xE0,0x00,0xE0,0x80,0x01,0x00,0x00,0x30,0xC0,0x01,
0x70,0xC0,0xE1,0x00,0x70,0x30,0x80,0x01,0x30,0xE0,0xF1,0x00,0xF0,0x70,0x80,0x01,
0x18,0x60,0x30,0x00,0xC0,0x60,0x0C,0x03,0x98,0x31,0x00,0x00,0x00,0xC0,0xFC,0x03,
0xCC,0x31,0xC0,0x03,0x3C,0xC0,0xF8,0x03,0xFC,0x30,0xC0,0x03,0x3C,0xC0,0x98,0x03,
0xFC,0x30,0x00,0x00,0x00,0xC0,0x18,0x00,0x4C,0x30,0x00,0x00,0x00,0xC0,0x30,0x00,
0x60,0x30,0x00,0x60,0x00,0xC0,0x30,0x00,0x60,0x60,0x00,0xF0,0x00,0x60,0x30,0x00,
0x40,0xE0,0x01,0xF0,0x00,0xF8,0x39,0x00,0xC0,0xC8,0x03,0x60,0x00,0xF8,0x19,0x00,
0x80,0x19,0x03,0x00,0x00,0xCC,0x1D,0x00,0x80,0x3B,0x83,0x01,0x18,0xEC,0x0D,0x00,
0x00,0x7F,0x86,0x01,0x18,0xFE,0x07,0x00,0x00,0xEE,0x86,0x01,0x18,0x3E,0x03,0x00,
0x00,0xC0,0x0F,0x03,0x0C,0x1F,0x00,0x00,0x00,0x00,0x1F,0x07,0x8E,0x03,0x00,0x00,
0x00,0x00,0x38,0xFE,0xC7,0x01,0x00,0x00,0x00,0x00,0x70,0xF8,0xE1,0x00,0x00,0x00,
0x00,0x00,0xE0,0x00,0x70,0x00,0x00,0x00,0x00,0x00,0xC0,0x07,0x3E,0x00,0x00,0x00,
0x00,0x80,0x03,0xFF,0x0F,0x0C,0x00,0x00,0x00,0xF0,0x07,0xFC,0x03,0x7E,0x00,0x00,
0x00,0xFC,0x0F,0x00,0x00,0xFF,0x03,0x00,0x80,0x1F,0x3F,0x00,0xC0,0x8F,0x0F,0x00,
0xC0,0x0F,0xFE,0x00,0xF0,0x07,0x3E,0x00,0xF0,0x0C,0xE6,0x07,0x7E,0x06,0x76,0x00,
0x38,0x0C,0x8C,0xFF,0x1F,0x03,0xE6,0x00,0x1C,0x0C,0x1C,0xFC,0x83,0x03,0xC7,0x01,
0x0C,0x0C,0x38,0x00,0xE0,0x01,0x83,0x03,0x06,0x0C,0xF0,0x01,0xF8,0x00,0x03,0x03,
0x06,0x0C,0xC0,0xFF,0x3F,0x00,0x03,0x06,0x02,0x0C,0x00,0xFE,0x07,0x00,0x03,0x06,
0x03,0x0C,0x00,0x00,0x00,0x00,0x03,0x04,0x03,0x0C,0x00,0x00,0x00,0x00,0x03,0x0C,
0x03,0x06,0x00,0x00,0x00,0x00,0x03,0x0C,0x03,0x07,0x00,0x00,0x00,0x00,0x06,0x0C,
0xFF,0xFF,0xFF,0xFF,0xFF,0xFF,0xFF,0x0F,0xFF,0xFF,0xFF,0xFF,0xFF,0xFF,0xFF,0x0F
};
/* (60 X 60 )*/


const uint8_t activeSymbol[] PROGMEM = {
    B00000000,
    B00000000,
    B00011000,
    B00111100,
    B01111110,
    B01111110,
    B00111100,
    B00011000
};

const uint8_t inactiveSymbol[] PROGMEM = {
    B00000000,
    B00000000,
    B00000000,
    B00000000,
    B00011000,
    B00011000,
    B00000000,
    B00000000
};
现象
因为 GIF 受到限制,所以我进行了一些处理,这样播放速度会与实际播放情况有所差别
结论
其实这个 OLED 库还有许多有趣的函数我还没有去尝试,在有时间的时候可以尝试下!
附录
- 可以到 Arduino IDE 的库管理搜索下方库进行下载
ESP8266 and ESP32 Oled Driver SSD1306 display
-
可到我的 github 下载源码、库、图片、软件 Arduino-OLED