How to make and run the 64-bit ubuntu on SD card for Banana Pi W2
1.Requirement:
-
A PC with ubuntu as the host;
-
A banana Pi W2 board;
-
A SD card;
-
Downloaded latest ubuntu base tar file (ubuntu-base-16.04.4-base-arm64.tar.gz) from url:
Ubuntu Base 16.04.6 LTS (Xenial Xerus) -
Hardware configuration file, u-boot binary file, kernel image file and audio file, which can be downloaded from:
https://drive.google.com/file/d/1LX4FwXcSzkuI4BUPEVxbUyeG_UYwIkwY/view?usp=sharing- oRTD1296_hwsetting_BOOT_4DDR4_4Gb_s1866_padding.bin – hardware config
- odvrboot.exe.bin – u-boot binary
- ouImage – kernel image
- obluecore.audio – audio and video firmware for RTK1296
2.Write the bootloader to the Banana Pi W2 flash:
Banana Pi W2 board can boot from EMMC flash or SPI flash on the board, the difference is the location of the bootloader, so if you will not participate in the development of u-boot, this will not matter to you. So here is how to write bootloader to EMMC.
Normally the W2 board you got had been programed in the factory, but if the version of the bootloader isn’t the latest one, I recommend you to program it by yourself again. The latest version of bootloader is available on the Banana Pi website.
Requirement:
- A windows PC runs serial terminal tool like hypertrm. (I recommend using “hypertrm”, because other tools sometimes fail to transmit data);
- Latest version u-boot binary file from Banana Pi website (dvrboot.exe.bin);
- A hardware configuration binary file for W2 (RTD1296_hwsetting_BOOT_4DDR4_4Gb_s1866_padding.bin);
Steps:
-
Connect the serial port between the host and the board correctly, run the terminal software and set up the relevant parameters (115200, 8N1, none);
-
press “ctrl+q” then to power on the board, and when the screen appears’ d/g/r ', it can be released;
-
Input “h” and send hardware configuration binary files (RTD1296_hwsetting_BOOT_4DDR4_4Gb_s1866_padding.bin) in Y-modem mode on the terminal side.
-
Wait for the transfer to complete, then input below in console:
s98007058
01500000
-
Input “d” and send u-boot binary files (dvrboot.exe.bin) in Y-modem mode on the terminal side.
-
Wait for the transmission to complete. Enter “g” then the u-boot will be programed to the EMMC automatically.
3.Make a ubuntu root file system for W2 on a ubuntu PC.
Ubuntu has the version for arm64 architecture, it’s suitable for the Banana Pi W2, most of packages built by ubuntu for arm64 can run on the W2 board.
Requirement:
- A PC runs linux (recommend ubuntu)
- The latest version of ubuntu tar file for arm64 (ubuntu-base-16.04.4-base-arm64.tar.gz) is downloaded from ubuntu website: Ubuntu Base 16.04.6 LTS (Xenial Xerus)
Steps: (on the host):
-
mkdir rootfs
-
su root
-
tar zxvf ubuntu-base-16.04.4-base-arm64.tar.gz -C rootfs
-
write a shell script file, please copy below contents to the file ch-mount.sh (vi ch-mount.sh and copy):
!/bin/bash
function mnt() { echo "MOUNTING" sudo mount -t proc /proc ${2}proc sudo mount -t sysfs /sys ${2}sys sudo mount -o bind /dev ${2}dev sudo mount -o bind /dev/pts ${2}dev/pts sudo chroot ${2} } function umnt() { echo "UNMOUNTING" sudo umount ${2}proc sudo umount ${2}sys sudo umount ${2}dev/pts sudo umount ${2}dev } if [ "$1" == "-m" ] && [ -n "$2" ] ; then mnt $1 $2 elif [ "$1" == "-u" ] && [ -n "$2" ]; then umnt $1 $2 else echo "" echo "Either 1'st, 2'nd or both parameters were missing" echo "" echo "1'st parameter can be one of these: -m(mount) OR -u(umount)" echo "2'nd parameter is the full path of rootfs directory(with trailing '/')" echo "" echo "For example: ch-mount -m /media/sdcard/" echo "" echo 1st parameter : ${1} echo 2nd parameter : ${2} fi -
apt-get install qemu-user-static
-
cp /usr/bin/qemu-aarch64-static rootfs/usr/bin
-
cp -b /etc/resolv.conf rootfs/etc/
-
./ch-mount.sh -m rootfs/
-
apt-get install iputils-ping
-
apt-get install udev
-
apt-get install net-tools
-
Modify the root password by running: “passwd root”
-
exit
-
./ch-mount.sh -u rootfs/
Until now, the ubuntu file system have been built successfully on the host, next we will write it to the SD card.
4.Write the system to the SD card (on the host):
Requirement:
- A SD card;
- Device tree binary file downloaded from Banana Pi website: bpi-w2.dtb;
- Kernel image file downloaded from Banana Pi website: uImage;
- Video and Audio firmware file downloaded from Banana Pi website: bluecore.audio;
Steps:
-
Using fdisk tool to create two partitions in SD card: format the first partition as FAT32, and the second partition as ext4; It’s recommended that the first partition size should not be less than 100M;
-
Copy the three files: bpi-w2.dtb, uImage, bluecore.audio to the first partition;
-
Copy the all files in root filesystem which just built by us to the second partition using root privilege:
cp -a rootfs/* /media/xxx/sdxx/
sync -
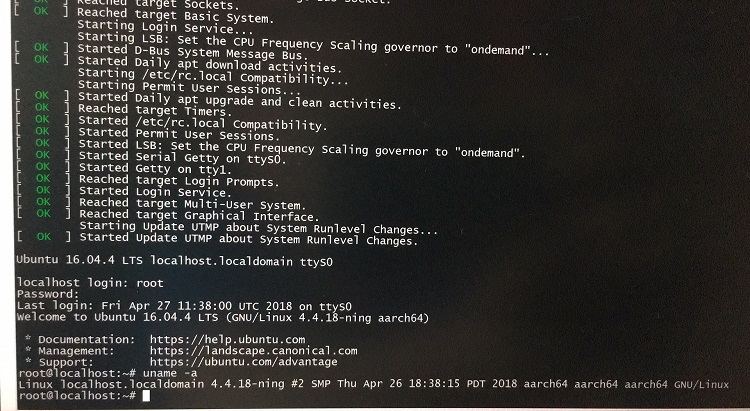
Eject the SD card and insert it to the W2 board, after power on the board, you can see the ubuntu is running now.
-
Set up network and get packages by using apt-get from ubuntu repository
Steps:
- Log in with root and the password was set by yourself;
- Ifconfig eth0 or eth1:
ifconfig eth1 192.168.2.231 - Add default gateway to let the board can reach internet:
route add default gw 192.168.2.1 - Add a DNS:
echo ‘nameserver 8.8.8.8’ >> /etc/resolv.conf - apt-get update
- then you can fetch and install any packages from ubuntu by using apt-get.
6.Furthermore:
Some functions are not available on the W2 now, because the kernel is not fully functional, we are working hard to make it more and more complete, please follow our official website update.
PDF documents:
How to make and run a ubuntu root filesystem on SD card for Banana Pi W2.pdf (174.3 KB)